Make these fun little bunnies fast and with few tools.
introduction
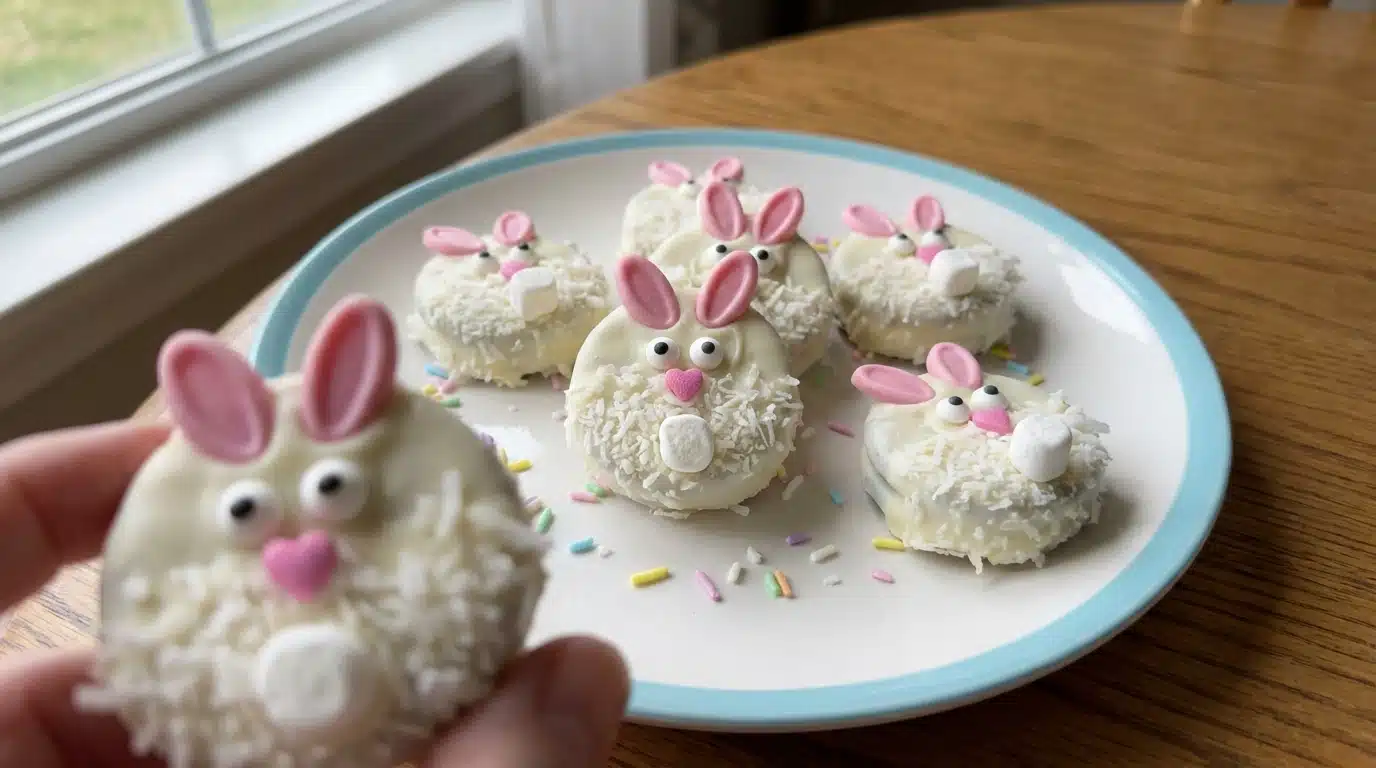
These Easter Oreo Bunny Cookies are quick and fun to make. They use Oreos, white chocolate, candy melts, and a few small decorations. If you enjoy simple cookie treats, you may also like the easy texture of rose and pistachio shortbread cookies for another small-batch idea.
why make this recipe
This recipe is simple and fast. Kids can help dip and decorate. You need no oven and you use store-bought cookies. It makes a cute Easter snack that looks special but takes little time. For another sandwich-cookie idea, see the classic vanilla sandwich cookies.
how to make Easter Oreo Bunny Cookies
Work on a clean table and set out all your decorations. Melt chocolate in short bursts and stir. Dip each Oreo and add ears, eyes, and sprinkles while the chocolate is wet. For tips on melting and getting the right coating, you can read a short guide about the secret to chewy cookies that also helps with chocolate setting ideas.
Ingredients :
- Oreo cookies
- White chocolate
- Colored candy melts (for decorating)
- Candy eyes
- Mini marshmallows (for ears)
- Sprinkles (for decoration)
Directions :
- Melt white chocolate in a microwave-safe bowl.
- Dip half of each Oreo cookie into the melted white chocolate and place on parchment paper.
- Using colored candy melts, drizzle over the dipped Oreos to create bunny designs.
- Add candy eyes and mini marshmallows for the ears while the chocolate is still wet.
- Sprinkle with additional decorations if desired.
- Allow to set before serving.
how to serve Easter Oreo Bunny Cookies
Place cookies on a clean plate or a small tray. Serve at room temperature. You can put a few on a paper doily for a simple Easter display. For serving ideas with other soft cookies, check a fun example like Vermont chewy molasses cookies.
how to store Easter Oreo Bunny Cookies
Keep the cookies in an airtight container. Store at room temperature for up to 3 days. If your home is warm, put them in the fridge for up to one week. Let chilled cookies come to room temperature before serving so the chocolate is not too hard.
tips to make Easter Oreo Bunny Cookies
- Use good quality white chocolate for smooth coating.
- Melt chocolate in 15–20 second bursts and stir between bursts. For more melting tips, review this guide on the best chocolate handling.
- Work in small batches so the chocolate stays smooth.
- Press the mini marshmallow ears lightly so they stick but do not fall off.
- Place cookies on parchment so they do not stick.
variation (if any)
- Use filled sandwich cookies in different flavors for color.
- Swap white chocolate for milk chocolate to make dark bunnies.
- Use colored sugar or edible markers to add more face details.
- Use small jelly beans as noses instead of sprinkles.
FAQs
Q: How long does it take to make these?
A: About 20–30 minutes, including setting time.
Q: Can I make these ahead?
A: Yes. Make them a day ahead and store in an airtight container at room temperature.
Q: What if my chocolate seizes?
A: If the chocolate gets grainy, add a little melted vegetable oil or shortening and stir slowly until smooth.
Q: Can I use store-bought candy eyes?
A: Yes. Candy eyes are easy to stick on while the chocolate is wet.
Q: Can I freeze these cookies?
A: You can freeze them, but decorations may shift. Wrap them gently and thaw in the fridge before serving.
Easter Oreo Bunny Cookies
Ingredients
Method
- Work on a clean table and set out all your decorations.
- Melt white chocolate in a microwave-safe bowl, in 15-20 second bursts, stirring between each.
- Dip half of each Oreo cookie into the melted white chocolate and place on parchment paper.
- Using colored candy melts, drizzle over the dipped Oreos to create bunny designs.
- Add candy eyes and mini marshmallows for the ears while the chocolate is still wet.
- Sprinkle with additional decorations if desired.
- Allow to set before serving.